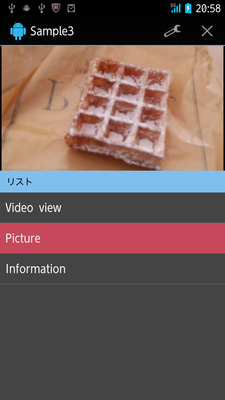
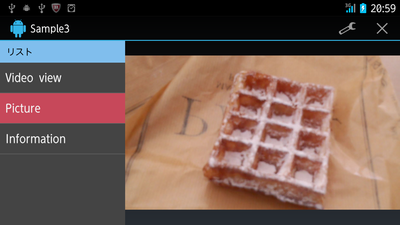
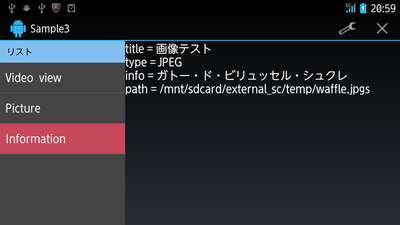
Fragment の入れ替えのサンプルです。
ListFragment 上の選択から、コンテンツを切り替えるサンプルです。
縦向き表示、

横向き表示

リスト選択を切り替えると、

のように、コンテンツ表示を切り替える=フラグメント入れ替えをします。
(どうでもいいことですが、この画像写真の PAUL のワッフルがお気に入りです)
縦向き用、レイアウト
<?xml version="1.0" encoding="utf-8"?>
<LinearLayout xmlns:android="http://schemas.android.com/apk/res/android"
android:layout_width="match_parent"
android:layout_height="match_parent"
android:orientation="vertical" >
<LinearLayout
android:id="@+id/container"
android:layout_width="match_parent"
android:layout_height="@dimen/phone_list_height"
android:orientation="vertical" >
</LinearLayout>
<fragment
android:id="@+id/fragment1"
class="sample.SampleListFragment"
android:layout_width="match_parent"
android:layout_height="match_parent" />
</LinearLayout>
res/land_layout/ に置く横向き用
<?xml version="1.0" encoding="utf-8"?>
<LinearLayout xmlns:android="http://schemas.android.com/apk/res/android"
android:layout_width="match_parent"
android:layout_height="match_parent"
android:orientation="horizontal" >
<fragment
android:id="@+id/fragment1"
class="sample.SampleListFragment"
android:layout_width="@dimen/phone_list_height"
android:layout_height="match_parent" />
<LinearLayout
android:id="@+id/container"
android:layout_width="match_parent"
android:layout_height="match_parent"
android:orientation="vertical" >
</LinearLayout>
</LinearLayout>
ListFragment で表示するレイアウトは、android:id="@id/android:list" で ListView を用意すること。
<?xml version="1.0" encoding="utf-8"?>
<LinearLayout xmlns:android="http://schemas.android.com/apk/res/android"
android:layout_width="match_parent"
android:layout_height="match_parent"
android:orientation="vertical" >
<TextView
android:id="@+id/textView1"
android:layout_width="match_parent"
android:layout_height="wrap_content"
android:background="#80c0ef"
android:paddingBottom="8dp"
android:paddingLeft="10dp"
android:paddingTop="8dp"
android:text="リスト"
android:textColor="#000000" />
<ListView
android:id="@id/android:list"
android:layout_width="match_parent"
android:layout_height="match_parent"
android:background="#444444" >
</ListView>
</LinearLayout>
res/dimens.xml で、固定サイズを宣言
<?xml version="1.0" encoding="utf-8"?>
<resources>
<dimen name="tablet_list_width">300dp</dimen>
<dimen name="phone_list_height">200dp</dimen>
</resources>
リスト1行のレイアウトは、マーク無しのCheckedTextView を使い選択状態を背景色で表現する。
<?xml version="1.0" encoding="utf-8"?>
<CheckedTextView xmlns:android="http://schemas.android.com/apk/res/android"
android:id="@android:id/text1"
android:layout_width="match_parent"
android:layout_height="?android:attr/listPreferredItemHeightSmall"
android:textAppearance="?android:attr/textAppearanceMedium"
android:gravity="center_vertical"
android:paddingLeft="?android:attr/listPreferredItemPaddingLeft"
android:paddingRight="?android:attr/listPreferredItemPaddingRight"
android:text="Medium Text"
android:background="@drawable/checked_list_selector"
/>
アクティビティの内容
public class SampleActivity extends Activity{
public final static String TAG_Content = "Tag_Content";
@Override
protected void onCreate(Bundle savedInstanceState){
super.onCreate(savedInstanceState);
setContentView(R.layout.layout_flagment_main );
if (null==savedInstanceState){
FragmentManager fm = getFragmentManager();
FragmentTransaction tr = fm.beginTransaction();
// android.app.Fragment を コンテンツ表示として初期に
// 割り当ててしまう。
tr.add(R.id.container, new Fragment(), TAG_Content);
tr.setTransition(FragmentTransaction.TRANSIT_FRAGMENT_FADE);
tr.commit();
}
}
// 他、 android.app.Activity#onCreateOptionsMenu などを書く
}
sample.SampleListFragment で、リスト選択時にコンテンツを切り替えを実行する。
つまり、上のレイアウトで定義した R.id.container に対して Fragameni の入れ替えを行う。
public class SampleListFragment extends ListFragment{
/** Fragment でパラメータ受け取る為のキー */
public final static String ARGV_KEY_1 = "Argument_1";
private List<Product> mList;
@Override
public void onCreate(Bundle savedInstanceState){
super.onCreate(savedInstanceState);
setRetainInstance(true); // 再生を抑止
}
// onActivityCreated で、ListAdapter セットなどを行う。
// getListView().setChoiceMode(AbsListView.CHOICE_MODE_SINGLE); も実行しておく。
/* @see android.app.ListFragment#onListItemClick(android.widget.ListView, android.view.View, int, long) */
@Override
public void onListItemClick(ListView listview, View view, int position, long id){
// リスト押されたものに対応する Fragment を生成して、
Fragment fragment = ....
// コンテンツ表示する為の情報を渡す。
Bundle bundle = new Bundle();
bundle.putParcelable(ARGV_KEY_1, product);
fragment.setArguments(bundle);
FragmentTransaction transaction = getFragmentManager().beginTransaction();
transaction.replace(R.id.container, fragment, SampleActivity.TAG_Content);
transaction.addToBackStack(null); // BACKキー押下で戻れるようにする。
transaction.setTransition(FragmentTransaction.TRANSIT_FRAGMENT_FADE);
transaction.commit();
}
// 他、省略。。